Why does my replaced seats and springs still leak?
Have you replaced your seats and springs on your faucet, yet it’s still leaking? It can be frustrating to spend time and money on a repair, only to have it not work.
A leaking faucet is a common household problem, and replacing the seats and springs is a common solution. However, sometimes even after the repair, the faucet continues to leak.
If you are experiencing this issue, it’s important to understand the potential reasons why your replaced seats and springs are still causing a leak. In this article, we will explore the possible causes and solutions to help you finally fix your leaking faucet.
Why should you replace seats and springs?
Replacing your faucet’s seats and springs is an essential task if you want to keep your plumbing system functioning smoothly. Over time, these parts can become worn, leading to leaks and other plumbing problems. In this article, we’ll discuss why it’s so important to replace seats and springs, and the benefits you will reap if you do.
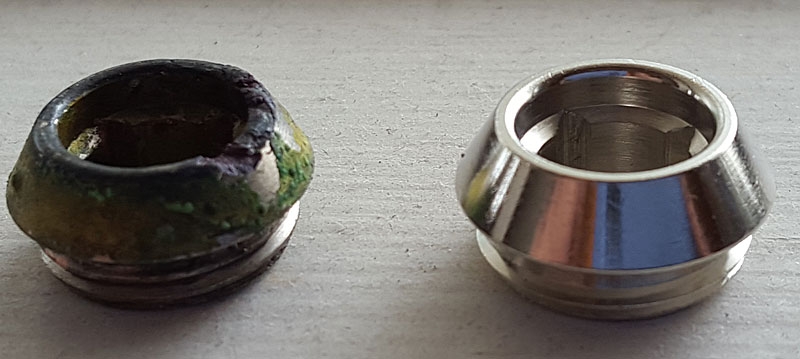
First of all, let’s understand what valves and seats are. Faucet valves are the stubborn nuts or screws that hold the faucet handles in place. Faucet seats are the tiny components that seal the gap between the valve and the spout, ensuring water flows through the faucet and not around it. The rubber seats inside the valves are also prone to wear and tear and can crack or corrode over time. Valve seats are crucial in preventing leaks, as they create a watertight seal.
One of the primary benefits of replacing your seats and springs is to prevent leaks. A leaky faucet can waste an enormous amount of water over time, resulting in higher water bills and wastage of natural resources. Repairing a leaky faucet is also a simple and cost-effective measure that can save you money in the long run.
In addition to preventing leaks, replacing seats and springs can also improve water pressure. A worn seat or spring can cause water to flow erratically, resulting in reduced water pressure. By replacing these components, you can restore optimal water pressure, which improves everything from bathing to dishwashing.
Another benefit of replacing seats and springs is that it can increase the overall lifespan of your faucet. By replacing these simple components, you’ll extend the life of your faucet and reduce the need for costly repairs, saving you money in the long run.
Lastly, replacing seats and springs is an easy DIY task that anyone can do with basic tools. All you need is a crescent wrench or adjustable wrench, needle-nose pliers, and possibly a screwdriver. By taking the time to replace your seats and springs, you’ll save money on plumbing expenses and improve your home’s overall efficiency.
Common Problems After Replacing Seats and Springs
Replacing seats and springs in a faucet is a common DIY task that most people can handle. It’s a simple and cost-effective measure that not only prevents leaks but also improves water pressure and extends the lifespan of the faucet. However, sometimes even after replacing the seats and springs, leaks can still occur. In this article, we’ll take a look at some of the common problems that can occur after replacing seats and springs.
One of the most common problems is the use of the wrong size or type of seat or spring. There are different types of seats and springs for different types of faucets, and using the wrong type or size can cause leaks. It’s important to consult the manufacturer’s instructions or seek professional advice to ensure you have the correct size and type of seat and spring for your faucet.
Another problem that can occur after replacing seats and springs is damage to other components of the faucet. During the process of replacing seats and springs, there is a high likelihood of damaging other components such as washers, o-rings, and seals. Damaged components can still result in leaks, even after replacing the seats and springs. It’s important to inspect the faucet thoroughly to ensure all components are in good condition before replacing seats and springs.
Sometimes, leaks can occur due to the valve body being damaged or corroded. The valve body is the part of the faucet that contains the valve, the seat, and the spring. Over time, the valve body can corrode, causing leaks even after replacing the seats and springs. In such cases, replacing the entire valve body may be necessary.
Finally, water pressure issues can also arise after replacing seats and springs. If the water pressure is too high, it can cause leaks even after replacing these components. Adjusting the water pressure can help solve this problem.
Steps to Replace Seats and Springs
Replacing seats and springs is an essential part of keeping your faucet in good working condition. Over time, these components can wear out, leading to leaks and other issues. If you’re experiencing leaks from your faucet, then it’s time to replace the seats and springs. Here are the steps for doing so:
Step 1: Gather Supplies
Before you begin, make sure you have all the necessary supplies. You’ll need replacement seats and springs, a crescent wrench, needle-nose pliers, and a screwdriver.
Step 2: Turn Off Water
The first step is to turn off the water supply to your faucet. Look for the shut-off valves under your sink and turn them off.
Step 3: Remove Faucet Handle
Use a screwdriver to remove the faucet handle by unscrewing the screw located under the decorative cap. If the handle is stuck, then you may need to use a wrench to loosen it.
Step 4: Remove Bonnet Nut
Remove the bonnet nut using a crescent wrench. Be careful not to damage the surrounding parts.
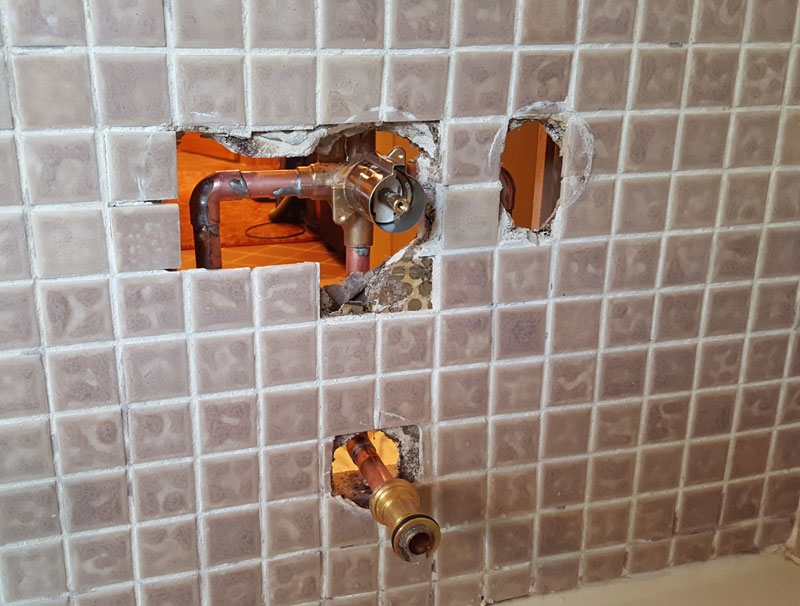
Step 5: Remove Valve Body
Take out the valve body by pulling it straight up and out of the faucet body. Set it aside along with the other components.
Step 6: Remove Old Seat and Spring
Remove the old seat and spring by using needle-nose pliers to grip the old spring and pull it out. Next, insert the pliers into the seat and twist it counterclockwise to remove it.
Step 7: Install New Seat and Spring
Insert the new seat into the faucet body and twist it clockwise to tighten it. Use the pliers to insert the new spring into the seat.
Step 8: Reassemble Faucet
Reassemble the faucet by reversing the previous steps. Make sure everything is tightened and secured properly to avoid any leaks.
Meet Lila Robinson, an expert in the world of plumbing with a talent for delivering valuable insights and captivating articles on an array of plumbing topics. With years of experience handling complicated plumbing issues, Lila has become a go-to resource for homeowners and businesses alike.
Packing vast knowledge in plumbing tools and science, Lila creates a sense of community on her blog and social media accounts, engaging with readers from all walks of life. Her writing style is authentic, unique, and engaging, and she has an exceptional ability to break complex concepts into understandable ideas.
If you have encountered a plumbing issue, chances are Lila Robinson has conquered it. Her articles uncover the underlying problems behind some of the most unexpected plumbing problems, from tankless water heater error codes to drain snakes in vents.
Whether you’re a beginner or an experienced plumber, Lila Robinson’s blog has something for you. Follow her social media accounts to keep up-to-date with the latest posts and join the conversation.